Tuesday, June 5, 2012

A Tour of the Community Garden

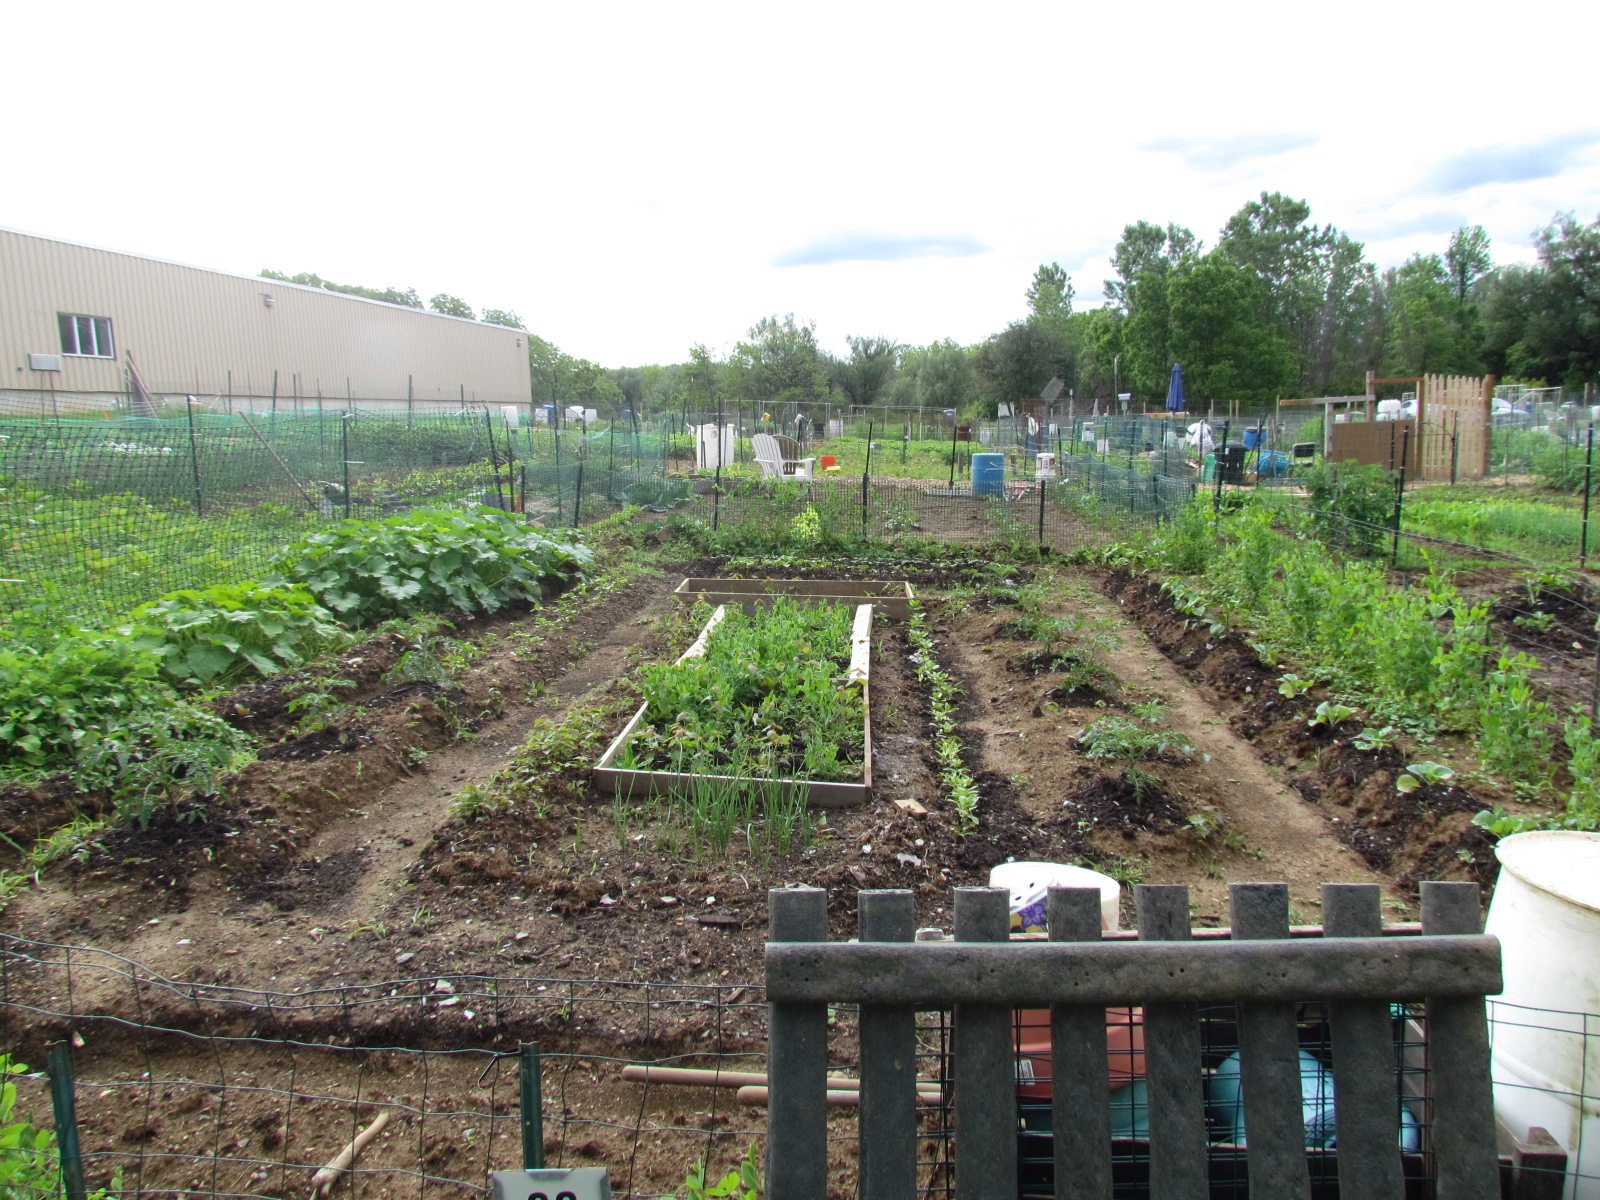
Late this afternoon, I walked the entire Community Garden and took pictures. I took 171 pics! There are 110 plots there. Here are some lovely sights. The garden has come a long long way!

Enjoy the tour!

Click on any pic to enlarge.


I think it's just amazing to see this not so long ago empty piece of land turned into all this!!


Sunday, June 3, 2012

Trellises at the Plots

I've been building some trellises at the plots this past week between the daily storms. I have to say that I am very happy with them and the plots overall.

Sophia's stepfather and his friend gave me some great bamboo!

Some pieces are 2" in diameter and were as long as 11'.
It's really nice and free!!!

I put two 8' high trellises in the front of the plots for two different varieties of yard long beans.

I really love the way they turned out!
And see that umbrella......Bill (another gardener) gave it to me! Boy, it's nice to have a shady spot to sit! Nope, the gate isn't in yet!

I also put up two trellises that I had at the other site. 
One is for Beans and one is for Cucumbers.

This bamboo trellis is at the end of the bed where I have the Raspberries and Blackberries. It's for the Dean's Purple Pole Beans.

I still have 4 or 5 more trellises to put up. This will depend upon whether I decide to trellis the little pumpkins that I planted. 


Thursday, May 31, 2012

Thursday's Kitchen Cupboard.........5/31/2012

Boy, this week has just flown by! I really thought today was Wednesday. I haven't posted or hardly read any blogs this past week. I think the heat really got to me.

This week I am going to post a recipe for Rose Petal Jelly. Although I did post this recipe last year,  I'm sure many of you did not see it. This jelly recipe was originally posted by Lynn at Wood Ridge Homestead in the Shenandoah Valley.

Tuesday afternoon, I noticed that the white roses were starting to go due to all of the rain. So, Sophia and I went out and picked  basket full of white roses and some red roses to make the jelly. My white roses are very fragrant, which is needed for a good jelly. My red roses, have hardly any fragrance. But they are added to give the jelly as nice color.


Rose Petal Jelly

  • 1 1/2 cups Rose petals, tightly packed
  • 2 1/4 cups water
  • 2 Tablespoons lemon juice
  • 3 1/2 cups sugar (preferably white sugar)
  • 3 oz packet liquid pectin
Gather fresh Rose petals to measure 1 1/2 cups tightly packed. Rinse petals and pat dry. Place petals in large pot and bruise petals so the scent and color can be extracted.


Add 2 1/4 cups of water to the petals in the pot and heat to boil. Turn down heat and simmer for several minutes, making sure the petals impart their color in the water. More than likely, the water may appear somewhat grey — the color will brighten with the addition of some lemon juice.


After the Rose petals have simmered for a few minutes, remove from heat. Using a fine sieve, strain the petals from the liquid.  Discard the petals and measure 1 3/4 cups of the distilled liquid for the jelly. Return the liquid to the pot, then add 2 Tablespoons of lemon juice and stir. The petal water will brighten significantly.

Add the sugar and stir to dissolve, then heat to boil, stirring constantly. Boil for 1 minute. Add liquid pectin and return to hard boil. Then allow jelly to boil for 1 minute while stirring continually.
Remove from heat and ladle jelly into 4 sterilized half-pint jars leaving 1/4-inch headspace. Add sterilized lids and rings. Process in water bath for 5 minute


Yield:  about 4 half pints


After we started on the jelly, I noticed that we didn't have enough sugar to make the jelly. The liquid is now in the refrigerator.


Sophia and I will finish the jelly this afternoon when she gets home from school.

This is what it looks like when it is finished.


It's really pretty and tasty too!

What's been going in or out of your cupboard lately......anything good????

Thursday, May 24, 2012

Thursday's Kitchen Cupboard .............05/24/2012

I can't believe that it is Thursday already! Boy, this week is just flying by! For Sophia's BD Bar BQ on Sunday, I made the first batch of baked beans this year. As I was making them I was thinking that I would use them for Thursday's Kitchen Cupboard. With everything going on, I forgot to take pictures.

I used the Great Northern White Dry Beans from last year's garden. That's the big jar of white beans in the back. These beans are only used for making baked beans.

These have to be the best Baked Bean in the world!
I found the original recipe on Allrecipes and have made a few minor adjustments over the years.

Baked Beans
   Ingredients:
  • 2 Cups Dry Beans, I use Great Northern. You can use Navy or any other bean of your choice
  • 3 Slices of Bacon
  • 1 Onion, finely diced
  • 3 Tbsp. Molasses
  • 1 tsp Salt
  • Pepper
  • 1 1/2 tsp Mustard or 1/4 tsp Dry Mustard, I use homemade Spicy Brown Mustard
  • 1/2 Cup Ketchup, I try to use homemade. It really gives them a nice flavor
  • 1 Tbsp. Worcestershire Sauce
  • 1/4 Cup Brown Sugar
   Directions:
  1. Soak the beans overnight in cold water. Simmer the beans in the same water for about 1-2 hours, until tender. Drain and reserve the liquid
  2. Preheat oven to 325 F
  3. Arrange the beans in a covered bean pot or 2 quart casserole with a lid by alternating the Beans, Bacon & Onions.
  4. In a saucepan, combine the Molasses, Salt, Pepper, Mustard, Ketchup, Worcestershire Sauce & Brown Sugar. Bring the mixture to a boil and pour over the Beans. Add just enough of the saved bean water to cover the beans
  5. Cover and bake for 2-4 hours until the beans are tender. Check on the beans about every hour to see if they need any additional liquid. If so, add some of the saved bean water. I also stir them when I check them.
  6. When the beans are tender they are ready to eat. But, I turn the oven off and let them sit for a few hours. I have found that they taste better the next day....so, this little trick of letting them sit does the trick and they taste just as good!
What goodies have been going in or out of your Cupboard lately???

Tuesday, May 22, 2012

The State of the Plots Mid-May

It seems like it has been non-stop since we got home from vacation! I spent a few hours at the plots on Saturday and then we had to go shopping for Sophia's BD Bar BQ on Sunday. We always seem to be away on her BD. So, I told here we would have a BD Bar BQ on Sunday after we came home. After shopping there were important things to do, like bake a cake and start the homemade baked beans. Sunday was packed full of putting the cushions on the outdoor furniture, cleaning up a bit, cooking and then putting up a canopy since the temps were in the 90's! The Bar BQ was a great success and Sophia was very happy!

Yesterday I had planned to catch up on blog reading and visit everyone's Harvest Monday posts. In the morning I decided to clean out the refrigerators and some canned peppers that I was not happy with. All went well until I managed to clog the plumbing in the under-slab in the basement between the main pipe coming from the kitchen and the floor drain. The remainder of the day was plumbing related, including a visit from the Roto Rooter man!

I was going to post the pics I took on Saturday. But, this morning I ran over to the plots in the misty rain to cover the strawberries that the birds think is a buffet! So, I took some more pics. There are lots of pics in this post!

Click on any picture to enlarge.

Before we went on vacation, I planted all of the Tomatoes, Eggplants & Peppers in the rain!! It wasn't the perfect time to plant them. Although Sophia is perfectly capable of taking care of the plants, I really didn't want her to have to tend to them. She does have school and track, which is very important.

Bed#1 The Potato Bed
The potatoes really took off while we were gone. Some of these weren't even out of the ground when we left. Hopefully, I can get over there tomorrow and mulch them with straw.

Bed #2 Tomato Alley #1
The tomatoes are doing very well with the exception of Aphids. I found aphids on some of the plants on Saturday. I was hoping that the pests wouldn't find the new garden the first year. I am going to make a spray today with potato leaves and see how that works.

The new growth looks great and so do the weeds!! Mulching to do!

Bed #3
The empty front section of this bed will have a Three Sisters Planting and some trellises for beans, cucumbers and cantaloupe

Toward the other end of this bed is Cauliflower, Eggplant and Hot Peppers. 
There is also space for another trellis at the end.

The cauliflower was really small when I put it in. I didn't think I would have the plots ready in time to plant spring cauliflower. We shall see if they produce. If not, I have plans for a fall planting in another space.

New growth on the Eggplants look great!

The Peppers also seem to be doing very well.

Bed #4 Tomato Alley #2
Not the best pic, but the tomatoes are doing just fine. There are two though that are struggling a bit. 

Bed #5
The empty section at this end will have trellises for more Beans, Spaghetti Squash and Korean Melons. At the far end is where the Zucchini will be planted.

This is toward the other end of Bed #5. 
I have planted Broccoli, a few Cabbage, 4 Chinese Cabbage and the Sweet Peppers. There are also some tiny Leeks planted in front of the Chinese Cabbage. Hopefully the Broccoli will produce since it was started earlier then the cauliflower. If not, there is a fall planting planned. One of the Chinese Cabbages bolted from the heat over the weekend. So, it will be removed.

Bed #6
The Blackberry & Raspberry transplants are doing very well. Since the blackberries won't get too big this year, I planted onions & celery around them. There is also space for a trellis on the end where I will plant Lima Beans.

Bed #7 The Strawberry Bed
The plants that I covered were transplanted from the old site. The new strawberry roots that were planted this year are at the far end mulched with straw. They are all doing very well.

Bed #8
This bed is along the right side of the plots. The Asparagus beds are at each end and there are onions and a few celery plants in the middle.

As you can see, the asparagus is going to ferns. I am so pleased that they made it through the transplant. Even though we did not have much of a harvest this year. The Fava Beans in the front are doing much better with the exception of ants. Last year I had the same problem with them. As soon as the rain stops I will try using cinnamon on the plants as a pest control.

That's the "State of the Plots" right now. There is still a ton of work and planting to do over there. I haven't decided what I am going to do with the paths. The gate is not up yet and I also have to sow the popcorn and beans along the front. I really think the worst part of the work is over. Hopefully, the weather will cooperate and I can spend a few days over there sowing some seeds and tidying up a bit!