Showing posts with label Recipes. Show all posts

Thursday, August 1, 2013

Sweet Pickle Relish

This is an easy relish recipe from the Ball Blue Book of preserving. I used to make a relish that took a day to make. However, "The Italian" likes this recipe much better. I think it's because you leave the spices in the jar. The taste gets better over time.

Sweet Pickle Relish-  Ball Blue Book

1 qt. Chopped pickling cucumbers

2 cups chopped onions

1 cup chopped sweet green peppers

1 cup chopped sweet red peppers

¼ cup salt

3 ½ cups sugar

2 cups cider vinegar

1 tbsp. celery seed

1 tbsp. mustard seed

I add about 1 1/2 tsp. tumeric

Combine cucumbers, onions, green and red peppers in a large bowl; sprinkle with salt and cover with cold water. I also top with a little ice to keep the ingredients cold. Let stand 2 hours. Drain thoroughly; press our excess liquid. Combine sugar, vinegar and spices in large saucepan. Bring to boil. Add drained vegetables and simmer 10 minutes. Pack into hot jars, leaving ¼-inch headspace. Adjust caps. Process 10 minutes in boiling water bath. Yields: about 3-4 pints.

Enjoy!
 

Thursday, October 11, 2012

Thursday's Kitchen Cupboard...........10/11/2012

Although most of the preserving is finished, I still have a few/many things to make or finish taking care of. Since the peppers are still going strong, I have made some pepper mash and will be experimenting with making hot sauces when we get back from vacation. I ordered the mustard seed for making mustard. That will also be started when we get back.

Presently there are two containers of pears sitting in the kitchen awaiting to be canned this Saturday. I will can them the same as the peaches with a mixture of fresh juice and light syrup. There's also the balance of the dry beans lying on racks drying in the spare bedroom. Hopefully they will be dry soon so I can finish shelling them, weigh them and put them away for later use. 

I haven't decided what I'm going to do about the popcorn. Most of the white corn is hanging in a mesh bag on the back of the door leading to the basement and most of the strawberry corn is hanging from the pot rack in the kitchen. I suppose that I will shell and weigh the white corn. However, we really like the look of the strawberry corn hanging in the kitchen. That corn may stay there for awhile since it's so pretty. There's also dried herbs and dried peppers hanging in the kitchen awaiting to be processed and put away for storage.  

It may sound like a lot and I'm sure that there is something I forgetting. With the exception of the canning of the pears, what's left to do really isn't all that bad. Most of it is fun and easy stuff, unlike the never ending canning and freezing of the summer crops this year!

Since I really didn't do any canning or preserving this week, I thought I would share a recipe and a tip. 

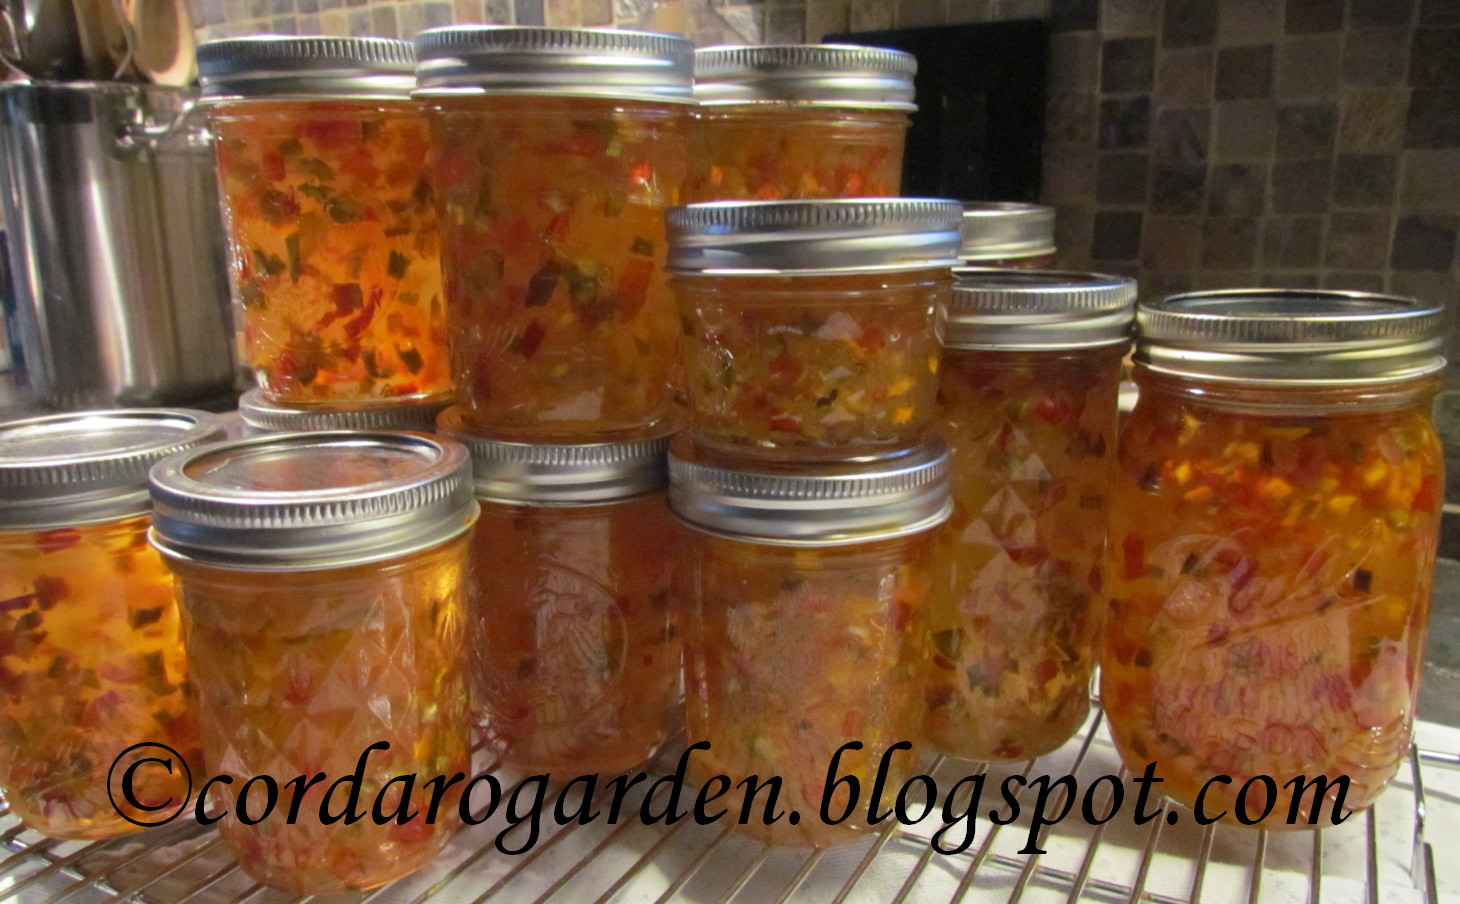
Hot Pepper Jelly
  • 2 Cups of finely chopped and seeded sweet peppers. I use a combination of colors to give the jelly a festive look
  • 3/4 Cup of finely chopped and seeded hot peppers. You can adjust the sweet/hot ratio if you prefer hotter jelly or you can add a Tablespoon of Red Pepper Flakes
  • 1 1/2 Cups Cider Vinegar
  • 6 1/2 Cups Sugar
  • 1 Pouch of Liquid Pectin
  1. Place all of the Peppers and Vinegar in a large saucepot
  2. Stir in Sugar and bring to a full rolling boil on high heat, stirring constantly
  3. Stir pectin in quickly and pepper flakes (if you are using them)
  4. Return to a full rolling boil and boil one minute
  5. Ladle into prepared jars, filling to within 1/8 inch of the top. Cover with hot lids and process in a boiling bath for ten minutes
Once the jelly is finished processing, I put the jars on a wire rack. Once they cool down a bit, I turn them upside down. Then I continue to turn and shake them until the jelly has jelled enough to keep the pepper pieces suspended throughout the jelly. If you don't do this, the pepper pieces will float to the top.

Isn't it pretty???

What's been going in or out of your Kitchen Cupboard lately....and are you finished preserving your harvest???

Since we will be on vacation for the next two Thursday's, Jody & Belle at Spring Garden Acre will be hosting Thursday's Kitchen Cupboard.

Thursday, October 4, 2012

Thursday's Kitchen Cupboard..............10/4/2012

The canning has really slowed down......thank heavens!! I still have some beans that are not completely dried and a basket of tomatoes that will most likely be made in to puree. I was planning to can some pears this week. But, "The Italian" ate them!! I guess I'll be going back to the orchard on Saturday to get more.

I figured I would post the Green Tomato Salsa recipe since a lot of you have been interested in it. This recipe is from Diana at Voice in The Garden. It's a big hit around here!

Green Tomato Salsa

Ingredients:

  • 3 Tbsp. Extra Virgin Olive Oil
  • 11 lbs. Green Tomatoes, chopped
  • 3 Extra Large Sweet Onions, chopped
  • 3 Sweet Peppers, chopped
  • 4 Jalapeno Peppers, seeds removed, finely chopped (+/- according to personal taste)
  • 8 Large Garlic Cloves, minced
  • 1 Cup Fresh Cilantro, chopped (I don't put this in before canning. It can be added, if wanted when served)
  • 2 Tbs. Sea Salt
  • 1/2 Tbsp. Black Pepper
  • 1/2 tsp. Cayenne Pepper
  • 1 tsp. Cumin
  • 1/4 Cup Lime Juice
  • 1/4 Cup White Vinegar
  • 1 Tbsp. Honey
Directions:

  1. Add Olive Oil to an extra large pot and heat on medium
  2. Add Tomatoes, Onions, Peppers and stir
  3. Add and combine the remainder of the ingredients. Mix well, hear slowly to a simmer and cook uncovered for 35-30 minutes, or until it reaches the consistency you prefer. Stirring frequently to avoid burning.
  4. Ladle the hot salsa into hot sterilized jars, and fill to within 1/2 inch from top.
  5. Wipe jar rims with a clean cloth
  6. Place sterilized lids on jars and adjust the ring.
  7. Place in boiling water bath and process for 15-20 minutes
This is not a full batch.
It sure is good.....Thanks Diana for the great recipe!!

What's been going in or out of you Kitchen Cupboard lately???

Thursday, September 27, 2012

Thursday's Kitchen Cupboard..........09/27/2012

The canning has been a lot more fun the past couple of weeks. I canned the balance of the peaches that "The Italian" and I got at the orchard.

They turned out perfect!
I can my peaches in a mixture of juice and light syrup. First I make some juice from the seconds. I just mash them up and strain the mash through a jelly bag. Then I make a very light syrup (recipe from the Ball Blue Book), combine the two and simmer. We really enjoy the peaches canned this way.

My fun jam of the year is this Carrot Cake Jam.
Sophia and I made it on Saturday. You can find the recipe here. I'm not sure if it tastes like carrot cake ....but it sure is tasty! With the combination of spices, we think it tastes like fall.

The small batch of sauerkraut was canned....

and for the first time I canned some Pimento Peppers!
Last year the groundhog ate each and every ripe pepper at the plots. We found how to can them here.

When I was finished canning the peaches, I made peach syrup with the leftover juice and light syrup mixture. I added a little more sugar and let it cook down. Of course "The Italian" had to make a nice drink using the syrup!!

Peach Martini

Peach Martini for two
5 oz. Vodka
4 oz. Peach Syrup
3 tsp. Sugar
Squirt of Lemon Juice
1 oz. Seltzer Float

Combine the first 4 ingredients in a shaker with some crushed ice, shake, pour into martini glasses, add seltzer or club soda, garnish with a slice of peach and enjoy!

What's been going in or out of you Kitchen Cupboard lately???

Thursday, September 20, 2012

Thursday's Kitchen Cupboard...........09/20/2012

There's been a lot of canning going on around here this past week! Since the tomatoes finally slowed down, I managed to get some other stuff done!

The first thing I did was pickle some Hot Banana, Hot Hungarian Wax and Sweet Banana Peppers!

Of course there was some Tomato Puree canned this week.

I made two batches of Hot Pepper Jelly
Isn't it beautiful???

Tuesday after work, I made a batch of Peach Jam
I ended up with 8 Half Pints and Two 4 oz. jars even after I spilled some!

Last but not least...."The Italian" made the best martini ever!! Yes, it was even better then Granny's Tomatotini! It was a Chocolate Raspberry Martini! Oh boy was it good!!!
He even said I could share the recipe!!

Chocolate Raspberry Martini for 2
4 oz. Homemade Raspberry Vodka
2 oz. Godiva Chocolate Liquer
1 oz. Chambord Liquer
Pour all ingredients in to a shaker with a little crushed ice
Shake and serve with a few raspberries
Enjoy!!!

Thursday, July 5, 2012

Thursday's Kitchen Cupboard...........07/05/2012

The preserving season is just beginning around here. I have been adding frozen broccoli and cauliflower to our stores. Some herbs have been dried. The spring peas are finished and some have been frozen. I am hoping to have fall peas to freeze as well. The garlic harvest was good and is now curing for storage. We will have plenty of garlic for the year and enough to plant in the fall.

The one thing that has been a hit around here lately is homemade ice cream! Ever since the little guys at Spring Garden Acre were here for a visit and showed me how to make a good ice cream. We just have to make it once a week. Thanks to Granny's great & easy recipe. We have made vanilla, strawberry and most recently vanilla ice cream with Heath Bars. Although it's not going in or out of our cupboard....just in our bellies! I want to share this wonderful homemade summer treat with all of you!

Vanilla Ice Cream
Ingredients:

  • 1 Cup Sugar
  • 4 Egg Yolks
  • 2 Cups Whole Milk or 2% Milk
  • 1 Cup Heavy Cream
  • 2 tsp. Vanilla
Directions:
  1. Combine sugar, egg yolks and milk in blender. Process until completely blended.
  2. Pour into saucepan and heat to boiling, stirring constantly.
  3. Remove from heat and place waxed paper over the top of the custard to prevent skin from forming.
  4. Chill several hours or overnight.
  5. The next day, stir in heavy cream and vanilla before adding it to your ice cream machine.
  6. Follow the ice cream machine's directions to freeze ice cream.
Note: If you want to add some fresh fruit from your garden. Chop about 2 Cups and add to ice cream toward the end of it processing.


This is the Vanilla Ice Cream with Heath Bar.
I cut the vanilla down to 1 tsp, smashed 4 candy bars in to pieces and added them to the ice cream while processing.
Yes, I had two scoops.....it was a Holiday!

What goodies have been going in or out of your Kitchen Cupboard lately???


Thursday, June 21, 2012

Thursday's Kitchen Cupboard...............6/21/2012

Yesterday, I finally got around to inventorying the chest freezer. All in all, we did pretty well using our frozen goods from the garden. I really thought there would be a lot of peppers left, since last year we had peppers galore. There are only about 5 small packages left. I did find a couple of packages of beans from 2009. I have no idea how I missed those before! The beans and a few packages of late snow peas from last year were tossed. The late spring snow peas were tough and we really didn't enjoy them. I was happy to find a package of celery since I thought we were about out. The frozen food from last year has been separated from this year's veggies. Now the freezer is nice and organized!

Last week I made a pasta dish with asparagus, garlic scapes and shrimp. It was one of those meals that I made up and it really turned out great!

Pasta with Aspargus. Garlic Scapes & Shrimp

Olive Oil
2 Garlic Scapes, chopped
1/2 lb. Shrimp
1 lb. Asparagus, chopped
1/2 Cup Vegetable Stock
White Wine
Butter
1 lb. Pasta
Grating Cheese

Directions:
Cook the pasta in a large pot of boiling water until al dente.

While the pasta is cooking, heat the olive oil in a large saute pan and saute the garlic scapes and asparagus until it's browned a bit. Add the shrimp and saute for about 2 minutes, until shrimp is cooked. Remove the shrimp from the pan and deglaze the pan with some white wine. Add the vegetable stock. Bring the mixture to a boil and simmer until asparagus is cooked to your liking.

Return the shrimp to the pan. Add the well-drained pasta to the sauce. Then add a couple of tablespoons of butter and stir over low heat until the pasta is coated with the sauce. Remove the pan from the heat and serve with your favorite grating cheese. This is all good with some red pepper flakes.

It was delicious!

What's been going in or out of your Cupboard lately???


Thursday, June 14, 2012

Thursday's Kitchen Cupboard................06/14/2012

This past week I have been harvesting the garlic scapes here at the home garden. Even though I have been a very bad blogger lately and haven't taken many (hardly any) pics of my harvests, I have taken some. Daphne, I promise I will join in on Harvest Monday this coming week!!!

I just love the look of the scapes! 

Since scapes are a once a year treat, I like to make something special with them. Last year I found a recipe for Garlic Scape Jelly. I did post this recipe last year. Because the jelly is just so wonderful, I am going to post it again for those of you who missed it.

Garlic Scape Jelly
  •  2/3 cup Garlic scapes, washed, with tops trimmed off
  • 2 sweet Bell peppers, washed and cut into chunks
  • 1 cup white vinegar
  • 5 cups sugar
  • 1 bottle liquid Pectin
  1. Cut the scapes into 1-inch sections and use processor or food grinder to finely mince the scapes.
  2. Remove the scapes from processor and place in stainless jelly pot.
  3. Process the Bell peppers until finely minced, then add them, with any liquid, to the scapes in the jelly pot.
  4. Add vinegar and sugar to the minced scapes and peppers. Stir until well blended. Slowly boil mixture for 10 minutes. Add liquid pectin and boil hard for 1 minute.
  5. Remove from heat and pour into sterilized half-pint or Jelly jars, to within 1/2-inch of top. Add sterilized caps and screw rings on. Process in water-bath canner for 5 minutes.
Yield: about 5 half-pints.

This batch made 5 1/2 half-pints 
One jar was given to our friends Jody, Belle & the little ones at Spring Garden Acre, who came to visit with us on Monday.

What's been going in or out of your Cupboard lately???


Thursday, June 7, 2012

Thursday's Kitchen Cupboard..........6/07/2012

Since half of my strawberry plants were moved and half are new roots this year, I am not anticipating enough strawberries to keep "The Italian" happy for a year. So, last Friday I went to an Organic Pick Your Own Strawberry Farm to pick some strawberries for canning and freezing. I picked 16 pounds of fresh strawberries. Needless to say, there were a lot of things strawberry going on around here this past week!

First, I made some Strawberry Jam following Daphne's recipe from last week. I usually use pectin in my jam and I think I was a little short on the amount of lemon juice needed. I also added about 1 1/2 Tbsp. of Balsamic Vinegar to the recipe. The vinegar is supposed to bring out the flavor of the strawberries. The jam tasted wonderful, but it was a little too runny. I ended up re-making it with some added pectin and now it is fine. I really think the Balsamic Vinegar gave it a great flavor.

Next, I made some Strawberry Syrup. Daphne posted about making this last week also. I used 4 Cups of crushed Strawberries, 2 Cup of Sugar and 1 1/2 Tbsp. of Balsamic Vinegar. The mixture was cooked for a few minutes until the Strawberries were soft. Next, I strained it with a jelly bag, returned it to the pan and cooked it down until it was more syrup like. It is wonderful!


Next on the list was Strawberry Infused Vodka. This is in the large jar on the left in the picture above. "The Italian" and I have made infused vodkas in the past, but never Strawberry Vodka. 


I found a recipe that called for 1 1/4 lbs. of Strawberries to 750ml. of Vodka. I used 1 lb. of Strawberries to 2 Cups of Vodka, since that's all that would fit in the jar. This is very easy to make. Just chop the strawberries, put them in the jar and add the vodka. Cover the jar and keep in a cool dark place for 3-5 days, stirring daily. I didn't stir it and it turned out great. When the vodka is ready, strain and return to a glass container. The Strawberry Vodka would be wonderful with a little Strawberry Syrup and some seltzer or to make a Strawberry Martini! We decided to save it for our special Gardening Blogging visitors this coming Monday! 

"The Italian" found a great Strawberry & Avocado Salsa recipe in a magazine to be served with Chipotle Grilled Pork Tenderloin. He and his daughter made this last Sunday for dinner. It was delicious!

Strawberry & Avocado Salsa
  • 4 Cups Quartered Strawberries
  • 1 1/3 Cups Chopped Peeled Avocado (about 1 large)
  • 1/4 Cup thinly sliced Green Onions
  • 2 Tbsp. chopped Fresh Cilantro (recipe calls for 1/4 Cup)
  • 3 Tbsp. Fresh Lime Juice
  • Salt
Combine all the ingredients in a bowl and toss gently.

The recipe for this salsa and pork can also be found here.


Other things Strawberry this week were Vanilla Ice Cream with Strawberry Syrup and fresh Strawberries, lots of plain Strawberries and Strawberry Shortcake. I also froze and vacuum sealed  four 1 1/2 lb. packages of fresh strawberries for later use. 

What's been going in or out of your Kitchen Cupboard lately???


Thursday, May 31, 2012

Thursday's Kitchen Cupboard.........5/31/2012

Boy, this week has just flown by! I really thought today was Wednesday. I haven't posted or hardly read any blogs this past week. I think the heat really got to me.

This week I am going to post a recipe for Rose Petal Jelly. Although I did post this recipe last year,  I'm sure many of you did not see it. This jelly recipe was originally posted by Lynn at Wood Ridge Homestead in the Shenandoah Valley.

Tuesday afternoon, I noticed that the white roses were starting to go due to all of the rain. So, Sophia and I went out and picked  basket full of white roses and some red roses to make the jelly. My white roses are very fragrant, which is needed for a good jelly. My red roses, have hardly any fragrance. But they are added to give the jelly as nice color.


Rose Petal Jelly

  • 1 1/2 cups Rose petals, tightly packed
  • 2 1/4 cups water
  • 2 Tablespoons lemon juice
  • 3 1/2 cups sugar (preferably white sugar)
  • 3 oz packet liquid pectin
Gather fresh Rose petals to measure 1 1/2 cups tightly packed. Rinse petals and pat dry. Place petals in large pot and bruise petals so the scent and color can be extracted.


Add 2 1/4 cups of water to the petals in the pot and heat to boil. Turn down heat and simmer for several minutes, making sure the petals impart their color in the water. More than likely, the water may appear somewhat grey — the color will brighten with the addition of some lemon juice.


After the Rose petals have simmered for a few minutes, remove from heat. Using a fine sieve, strain the petals from the liquid.  Discard the petals and measure 1 3/4 cups of the distilled liquid for the jelly. Return the liquid to the pot, then add 2 Tablespoons of lemon juice and stir. The petal water will brighten significantly.

Add the sugar and stir to dissolve, then heat to boil, stirring constantly. Boil for 1 minute. Add liquid pectin and return to hard boil. Then allow jelly to boil for 1 minute while stirring continually.
Remove from heat and ladle jelly into 4 sterilized half-pint jars leaving 1/4-inch headspace. Add sterilized lids and rings. Process in water bath for 5 minute


Yield:  about 4 half pints


After we started on the jelly, I noticed that we didn't have enough sugar to make the jelly. The liquid is now in the refrigerator.


Sophia and I will finish the jelly this afternoon when she gets home from school.

This is what it looks like when it is finished.


It's really pretty and tasty too!

What's been going in or out of your cupboard lately......anything good????

Thursday, May 24, 2012

Thursday's Kitchen Cupboard .............05/24/2012

I can't believe that it is Thursday already! Boy, this week is just flying by! For Sophia's BD Bar BQ on Sunday, I made the first batch of baked beans this year. As I was making them I was thinking that I would use them for Thursday's Kitchen Cupboard. With everything going on, I forgot to take pictures.

I used the Great Northern White Dry Beans from last year's garden. That's the big jar of white beans in the back. These beans are only used for making baked beans.

These have to be the best Baked Bean in the world!
I found the original recipe on Allrecipes and have made a few minor adjustments over the years.

Baked Beans
   Ingredients:
  • 2 Cups Dry Beans, I use Great Northern. You can use Navy or any other bean of your choice
  • 3 Slices of Bacon
  • 1 Onion, finely diced
  • 3 Tbsp. Molasses
  • 1 tsp Salt
  • Pepper
  • 1 1/2 tsp Mustard or 1/4 tsp Dry Mustard, I use homemade Spicy Brown Mustard
  • 1/2 Cup Ketchup, I try to use homemade. It really gives them a nice flavor
  • 1 Tbsp. Worcestershire Sauce
  • 1/4 Cup Brown Sugar
   Directions:
  1. Soak the beans overnight in cold water. Simmer the beans in the same water for about 1-2 hours, until tender. Drain and reserve the liquid
  2. Preheat oven to 325 F
  3. Arrange the beans in a covered bean pot or 2 quart casserole with a lid by alternating the Beans, Bacon & Onions.
  4. In a saucepan, combine the Molasses, Salt, Pepper, Mustard, Ketchup, Worcestershire Sauce & Brown Sugar. Bring the mixture to a boil and pour over the Beans. Add just enough of the saved bean water to cover the beans
  5. Cover and bake for 2-4 hours until the beans are tender. Check on the beans about every hour to see if they need any additional liquid. If so, add some of the saved bean water. I also stir them when I check them.
  6. When the beans are tender they are ready to eat. But, I turn the oven off and let them sit for a few hours. I have found that they taste better the next day....so, this little trick of letting them sit does the trick and they taste just as good!
What goodies have been going in or out of your Cupboard lately???

Thursday, May 10, 2012

Thursday's Kitchen Cupboard...........05/10/2012

I had a very nice meal that I was going to make last night for dinner and post today. When "The Italian" got home I ran out to the store to pick up a couple of essential things that I need for vacation. It wasn't much, just a couple of plain T-Shirts and a Jean Skirt. That should be an easy task and only require one or two stores...right??? Nope, it took me several hours and a lot of frustration!! What is with the clothes today??? The fabrics are just awful and the styles....well, much to be desired! After several hours, I did end up finding basically what I need and it was take-out pizza for dinner at 8:30 PM!

The post that I had planned is not to be. So, I figured that I would share another simple seasoning recipe of "The Italian's", a nice Bean Recipe and also show you what my cupboard looks like today.

You may remember the well stocked Cupboard of canned goodness that I had at the end of canning season last year. You can see it here. Well, this is what the Cupboard looks like today.


Sorry about the mis-aligned pics. I couldn't get Blogger to do what I wanted. As you can see, our stores are getting pretty low. 

Steak Seasoning
  • 2 Tbsp. Salt
  • 2 Tbsp. Paprika
  • 1 Tbsp. Coarse Ground Black Pepper
  • 1 1/2 tsp. Onion Powder
  • 1 1/2 tsp. Garlic Powder
  • 1 1/2 tsp. Cayenne Pepper
  • 1/2 tsp. Coriander
  • 1/2 tsp. Tumeric

The following recipe was originally posted by Anna at MojVrt. She no longer has a blog and I sure do miss her.

Beans in White Dill Sauce

  • 1 lb. Green Beans
  • 4-5 Tbsp. Flour
  • 2-3 Cloves of Garlic
  • 2 1/2 Cups Milk
  • Oil
  • Chopped Dill at least 2 Tbsp.
  • Salt & Pepper
Saute Chopped Garlic and Flour in oil on medium heat. Add Milk & Salt & Pepper. Stir until the sauce starts to cook. Then add beans and cook for about 10 minutes or until the beans are done to your liking.

This is a very simple and very tasty recipe that will come in handy once bean season starts.

How is your Cupboard looking these days????

Thursday, May 3, 2012

Thursday's Kitchen Cupboard.........5/03/2012

This past week I harvested the remaining overwintered greens and spinach and pulled the plants. A great deal of the harvests have been frozen for another day. I haven't updated my Preserving Page yet. Hopefully, I will get to it later this morning. It's been crazy busy and will continue to be that way until we go on vacation late next week.

The spring planted greens are starting to produce. Last night I made a nice Italian dinner for "The Italian" with some Arugula that I have been eyeing in the garden. I really don't remember where I found this recipe. But, I did make some changes and it was absolutely delicious!

Peppery Pasta with Arugula & Shrimp

  • 1 Tbsp. Minced Garlic
  • 1 1/4 tsp Black Pepper (I think I used about half this amount)
  • 1/2 tsp Salt (I think I used about half this amount also)
  • 5 oz. Baby Arugula (I used some larger Arugula)
  • Pasta of choice, Spaghetti, Linguine or Angel Hair
  • 1 Tbsp Olive Oil
  • 1/2 lb Peeled & Cleaned Shrimp
  • 2 Tbsp Minced Shallots (We didn't have any so I used some finely sliced leeks)
  • 3/4 Cup Chicken Stock ( I used Vegetable Stock)
  • 1 Tbsp Butter
  • 2 Tbsp Fresh Lemon Juice (I used half of a small lemon to make the juice, which was less)
  • Fresh Grated Cheese
Directions

  1. Combine half of the Garlic, Pepper, Salt and Arugula in a large bowl and toss.
  2. Boil water and prepare the Pasta al dente. Drain pasta, add hot pasta to Arugula mixture and toss well until the Arugula wilts.
  3. While the pasta is cooking, heat oil in large skillet over medium-high heat. Add shrimp and remaining Salt & Pepper, saute for 1 minute. Add remaining Garlic & Shallots, saute for an additional minute or until Shrimp are done. 
  4. Remove Shrimp from pan and deglaze the pan with the stock. At this point, I added the Arugula mixture to the pan, since I didn't used baby Arugula and it needed to be cooked a bit. Cook for 3-5 minutes, then return the Shrimp to the pan. 
  5. Toss the mixture with the Pasta and serve with Fresh Grated Cheese. 
We also had some nice Fresh Baked No-Knead Bread with our dinner.
It was perfect!

What have you been putting away for another day or making from your stores or harvests lately???


Thursday, April 26, 2012

Thursday's Kitchen Cupboard...........4/26/2012

This week we had one of our favorite meals, Fish and Cauliflowerslaw. A few years ago "The Italian" created Cauliflowerslaw. It's like coleslaw.....but, much much better! I'm also going to share his Rub Recipe with you. This rub can be used on fish or pork.

Rub for Fish or Pork
1/3 Cup Brown Sugar
1/4 Cup Salt (I'm not sure if he uses this much salt)
1/2 Cup Chili Powder
1/2 Cup Paprika
1/8 Cup Ground Allspice
2 Tbsp. Black Pepper
1 Tbsp. Cinnamon
2 tsp. Cumin
2 tsp. Garlic Powder
2 tsp. Celery Seeds

The recipe is a lot. We keep a batch of this rub in the freezer and use it whenever we need it. You could cut the recipe down and make a small amount for one meal.

Season Fish and Fry in Butter....that's it!

Cauliflowerslaw
These ingredients are approximate since we don't measure when making it....so, you may have to adjust them a bit.
  • Cauliflower, cooked al dente and then chilled
  • 1 1/2 Cups Mayonnaise
  • 2 Tbsp. Apple Cider Vinegar
  • 1 Tbsp. Sugar
  • 1 tsp.Celery Seed
  • 2 Dashes of Worcestershire Sauce (this is his secret ingredient)
  1. Cook and chill Cauliflower.
  2. Mix remaining ingredients together, pour over cauliflower & mix
  3. Refrigerate until ready to use. I think this is better after it sits overnight. But, it's great when fresh too.
This Slaw is wonderful! We like it much better then Coleslaw!

What's been going in or out of your Kitchen Cupboard lately????

Thursday, March 29, 2012

Thursday's Kitchen Cupboard..........3/29/2012

I was planning to do a post today on how to freeze greens. I will do that next week. Instead I will share a couple of great meals we had this past week from our nice harvests of Greens & Spinach.

One wonderful meal was Paprika Pork Chops w/ Spinach & Raisins. I didn't take any pictures of it and I thought that I had posted it last year. But, I can't find it on the blog. I have to say that this meal is a winner and it's a great way to get the "little" ones to eat their spinach!

Paprika Pork Chops w/Spinach & Raisins


    Ingredients:
  • 1 Tbsp. Olive Oil
  • 4 Bone-In Pork Chops (about 1" thick)
  • 1 - 2 Tbsp Paprika
  • Salt & Pepper
  • 1/4 Cup Stock or water
  • 4 Green Onions, chopped
  • 1/4 Cup Raisins
  • 10 oz. Spinach
  • 1 Tbsp Fresh Lemon Juice
   Directions:
  1. Heat oven to 400° F. Heat the oil in a large skillet over medium-high heat.
  2. Season the chops with the paprika, ½ teaspoon salt, and ¼ teaspoon pepper and cook until browned, 2 to 3 minutes per side.
  3. Transfer the chops to a rimmed baking sheet and roast in the oven until cooked through, 10 to 12 minutes.
  4. Meanwhile, return the skillet to medium heat. Add a little stock or water, about 1/4 Cup, add the scallions and raisins and cook, stirring, for about a minute
  5. Add the spinach and Cook, tossing, until just wilted, 1 to 2 minutes. Stir in the lemon juice. Serve with the chops. 
This next recipe is how I cook a Pot Roast with greens. I did take some pictures of this!
Braised Beef w/Greens
   Ingredients:

  • Roast of choice, it could be Beef or Pork. I used a Beef Chuck Roast
  • 1 Tbsp Olive Oil
  • Salt & Pepper
  • Onions
  • Wine - I use Red Wine for beef
  • Lots of fresh chopped Greens from the garden

Directions:
  1. Slice an onion or two and salt & pepper roast
  2. Heat the olive oil a nice big pot over medium/high heat. Then Sear the meat on all sides.
  3. Add the onions while searing the meat
  4. When you are finished searing the meat, remove to plate and de-glaze the pot with the wine. 
  5. Return the meat to the pot and add some more wine and a little water.
  6. Bring to a boil, cover and reduce heat to medium or low. Then cook for about 2-3 hours. I like to cook my roast until it falls apart.
  7. When your roast is cooked to your liking, add chopped greens to liquid and cook until tender.
This is not the best picture...but, it sure was yummy! I served the roast and greens with some mashed cauliflower....yum!!

So, What have you been making from your stored or fresh harvests....or putting away for another day??


Thursday, March 22, 2012

Thursday's Kitchen Cupboard..........3/22/2012

I haven't been the most creative cook around here this week. I think those couple of days at the plots and the warm weather has been keeping me away from cooking a bit. I have also been spending the mornings taking care of my neighbor. She had a spinal cord injury and had to have surgery on her neck. This injury has severely affected her hands and her walking a bit. I think I've been doing more cooking over there then here.

Last night I realized that I hadn't taken any pictures of anything for today's post. So, I made another really easy pasta dish for "The Italian". He is one happy Italian this week. We had two of his favorites dishes two nights in a row! I don't think that I have posted this recipe before. If so, here it is again.

Pasta Piselli
   Ingredients:
  • 1 Package of Frozen Peas or 1 Can of Le Sueur Peas
  • Olive Oil
  • Chopped Onion
  • Canned Tomatoes or Tomato Puree (this time I used 1 pint of puree and 1 pint of whole tomatoes)
  • Pasta of your choice
  • Grating Cheese 
   Directions:
  1. Chop about 1/2 of a medium onion
  2. Saute the chopped onion in a little olive oil until translucent
  3. Add puree or tomatoes, bring to a boil then reduce and cook for about 30 minutes or until desired thickness
  4. When your water is about ready to cook the pasta, add the peas to the sauce
  5. Serve with grated cheese.........that's it, no other ingredients or seasonings! 
This is a great Easy Peasy Recipe!!

I found some wonderful cheese in the cheese drawer that we bought in Little Italy. Grated it and served it in this pretty little bowl.

So, what have you been whipping up with your stored goods or putting away for another day??? 


Thursday, March 15, 2012

Thursday's Kitchen Cupboard..........3/15/2012

This past Saturday I made a wonderful dish with some of the fresh greens from the cold frame beds and peach jam glazed pork chops. As usual I searched the internet for a recipe for Jelly or Jam Glazed Pork Chops and some Braised Greens. I found a few recipes. They gave me some ideas and this is what I came up with. This is one of those recipes that turned out perfect!

Jelly or Jam Glazed Pork Chops & Greens
   
    Glaze:
  • 3/4 Cup Fruit Jam or Jelly - I used some Peach Jam that I had in the Cupboard. I really think any type of homemade jam or jelly would be great.
  • 1 piece of Fresh Ginger - grate about 2 tsp.
  • 2 Cloves Garlic minced
  • 3 Tbsp Apple Cider Vinegar
  • 2 Tbsp of good Soy Sauce
  • Pepper of your choice - I used some homemade Cayenne pepper, probably about 1/4 tsp.
    Directions:
  1. Combine Jam & Vinegar in a small saucepan
  2. Cook over low heat until the jelly or jam melts
  3. Stir in Ginger, Garlic, Soy Sauce & Pepper and set aside

Greens & Glazed Pork Chops
  • Pork Chops
  • Olive Oil
  • Fresh Chopped Greens - about 8 Cups - I used a combination of Baby Choi, Tatsoi, Kale & Collards
  • 1/4 Cup Water or Vegetable Stock -  I used Veggie Stock
  • 1-2 Cloves of minced Garlic
  • Salt & Pepper
   Directions:
  1. Chop Greens


      2.   Salt & Pepper the Pork chops, heat a grill pan or frying pan on med/high with a little olive oil
      
      3.   While the pan for the pork chops is heating up, add a little Olive Oil to another large skillet or wok over med/high heat.

      4.   Add the greens & garlic to the skillet and saute for a few minutes. I always add the stalk of the greens first since they take longer to cook.

      5.   Add the Veggie Stock or water to the greens and about half of the glaze. Cover and simmer until done.

      6.   When the pan for the pork chops is hot, grill each side for about 3 minutes. Then glaze with the Jam glaze and cook each side for about 4 minutes on each side or until done.

This was one of the best dishes we have had in awhile!

So, what good dishes have you been making with your stored goods......or what have you been putting away for another day????


Thursday, March 8, 2012

Thursday's Kitchen Cupboard..........3/08/2012

A few days ago "The Italian" wanted pasta for dinner. Can you believe that??? Well, he would eat pasta every day!!


I looked in the freezer and found some zucchini slices that I had fried and froze for later use. So, I decided to make a plain red sauce. He just loves pasta with a nice red sauce and zucchini slices on the side.


It's a simple and good dish. Just saute some chopped onions, add a little chopped garlic and then some nice canned tomatoes or tomato puree, some oregano & basil. Bring to a boil and then simmer for about 30-40 minutes. I baked the zucchini slices in the oven on 400 for about 15 minutes. Easy and delicious!


"The Italian" had his with pasta....and

I had mine with Spaghetti Squash! Yum!

So, what have you been making with your stored goods....or putting away for another day???

Thursday, March 1, 2012

Thursday's Kitchen Cupboard..........3/01/2012

I woke up this morning and realized it was Thursday and I hadn't done a post for Thursday's Kitchen Cupboard! Boy the week and the month just flew by! I can't believe that is March already. Before we know it the gardening season in this part of the world, will be under way! Then there will be lots goodness going in the cupboard too!

I found a great recipe a couple of months ago for a Stuffed Flank Steak here. It is supposed to be rolled. But, one flank steak makes three meals for "The Italian" and I. 1/3 is used for regular marinated broiled flank steak. 1/3 is used for a stir fry and the remaining 1/3, I have been stuffing. We love this recipe so much that I made a whole one for il secondo at "The Italian's" Birthday dinner this past Sunday. Yes, the Italian has reached "the speed limit age"!

Stuffed Flank Steak
Ingredients:

  • One Flank Steak
  • 1/4 Cup Soy Sauce (We use the good stuff from the Asian grocery store. It really makes a big difference in the taste. You can actually find labeled non GMO food at these stores!)
  • 1/2 Cup Olive Oil
  • 2 tsp. Steak Seasoning or a combination of seasonings of your choice
  • Thinly Sliced Provolone Cheese
  • Sliced Bacon
  • Fresh Spinach
  • Mushrooms (one time I used them)
  • Sliced Bell Pepper 
This is just 1/3 of a whole Flank Steak
Directions:
  1. If you are using a whole flank steak, cut through the meat horizontally to within about an inch or so of the opposite side. If you are using a piece, you will have to cut it the opposite way to create a pocket. You can also have your butcher butterfly it for you.
  2. Mix the Soy Sauce, Olive Oil & Seasonings together. Then marinate the steak with this mixture. You are supposed to marinate it for 4 hours or overnight. I have made it after only marinating it for about 30 minutes and it was great!
  3. Preheat the oven to 350 degrees F (175 degrees C)
  4. Layer the Provolone Cheese, Bacon, Spinach, Mushrooms & Pepper inside the pocket.
  5. Roll the meat (if you can) and then tie it with kitchen twine about every 2" to keep it together.
  6. Place in a baking dish and pour what ever marinade you have left over the meat and bake..
  7. The directions say to bake for one hour. I have found that with a small piece it only takes about 15-20 minutes. When I made a whole one it baked for about 30-35 minutes. We do not like out meat well done and dried out.
  8. Let the meat rest for about 5-10 minutes, slice and serve
This is the best Stuffed Flank Steak ever!

I served it with Mashed Cauliflower. If you have never had it...you don't know what you are missing! Just cook some nice cauliflower. Place it in your food processor (or you can mash it with a mixer or by hand), add some Butter, Adobe or other seasonings like garlic, Cheese of your choice and a little milk, if needed and mash. I like Mashed Cauliflower much better then Mashed Potatoes. It is also much better for you and a great way to get the little ones to eat more veggies! They will never know it's good for them!

So, What goodies have been going in or out of your Kitchen Cupboard Lately????


Thursday, February 16, 2012

Thursday's Kitchen Cupboard..........2/16/2012

I have been a bit absent from the blogging scene the past few weeks. This has been due to my Uncle's serious illness and passing on Valentine's Day. I'm sure I will get back into the swing of things in a week or so. 

I will be out of town next week for a few days. So, Jody & Belle at Spring Garden Acre will host Thursday's Kitchen Cupboard next week.   

Now on to some good eating from our stored goods! Last week Kristen at Rusty Moon Homestead posted a great recipe for Black Bean Soup. In her post she linked to where she found the recipe, here.   


Black Bean Soup           


Ingredients:
  • 2 Cups Black Beans  - I used Cherokee Trail of Tears Beans from the garden
  • 1 Small Onion, Sliced
  • 3 Tbsp. Butter
  • 2 Quarts Cold Water
  • 2 Stalks Celery, Diced
  • 1 1/2 Tbsp. Flour - I didn't need to use any flour
  • 3/4 tsp. Salt - I didn't use any salt
  • 1/8 tsp. Pepper
  • 1/4 tsp. Mustard - I used some homemade mustard and put in about 1/2 tsp.
  • Dash of Cayenne - I used about a 1/4 tsp.
  • 1 Tbsp. Lemon Juice - I didn't use this much
  • Hard Boiled Eggs or Egg
  • 1 Lemon, thinly sliced - We didn't use any sliced lemon
Directions:
  1. Wash beans and soak overnight.
  2. Saute Onion in 1 1/2 Tbsp. Butter
  3. Drain Beans, add cold water, onion & celery. Simmer until beans are tender, adding water if needed
  4. Then I pureed the soup with an Immersion Blender. 
  5. Add remaining 1 1/2 Tbsp of Butter, flour (if needed) and seasonings and bring back to a boil
  6. I let the soup simmer for about another 30-45 minutes
  7. The soup can be served with a garnish of Sliced Hard Boiled Egg and Lemon
It may not be the prettiest soup......But, boy was it good!

What have you been putting in or taking out of your Cupboard lately....anything good????